
The Knowledge Centre
Microsoft 365 StaffHub is a fantastic staff rota building app. So easy to setup and use and even better there is a mobile app, where staff can request shifts, view their weekly planner and request changes.
Let’s setup a rota from scratch and see how it works.
Log into Staff Hub: HERE
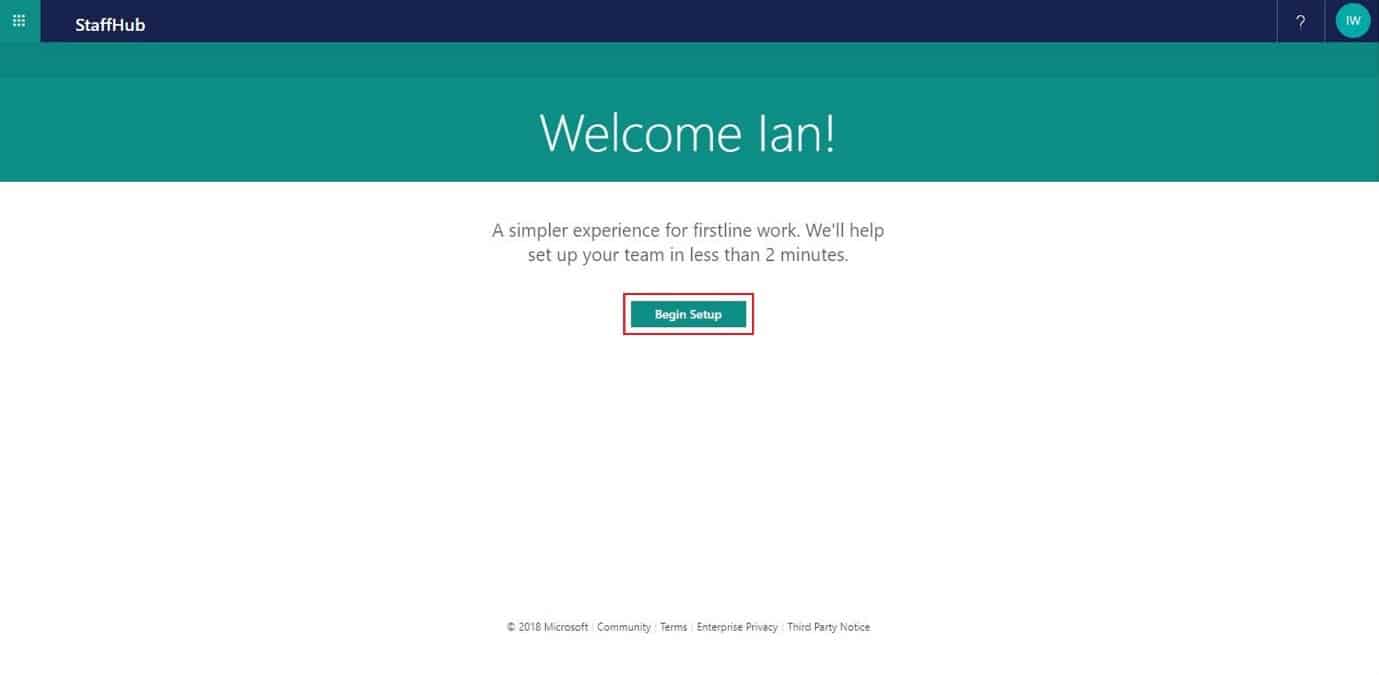
The first time you login it will start the setup wizard, press ‘Begin Setup’ to get started.

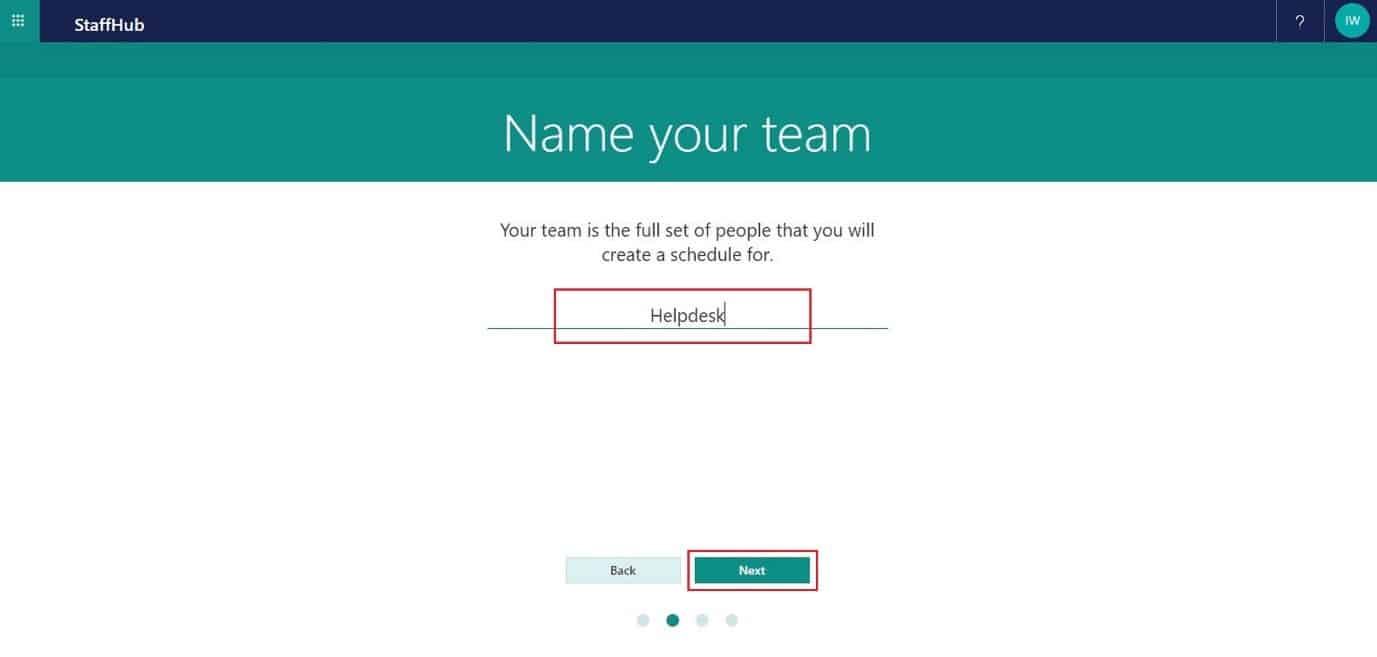
Enter a name for your team, here we are setting up a rota for our helpdesk team. Keep this name generic because you can split the rota into different teams later.

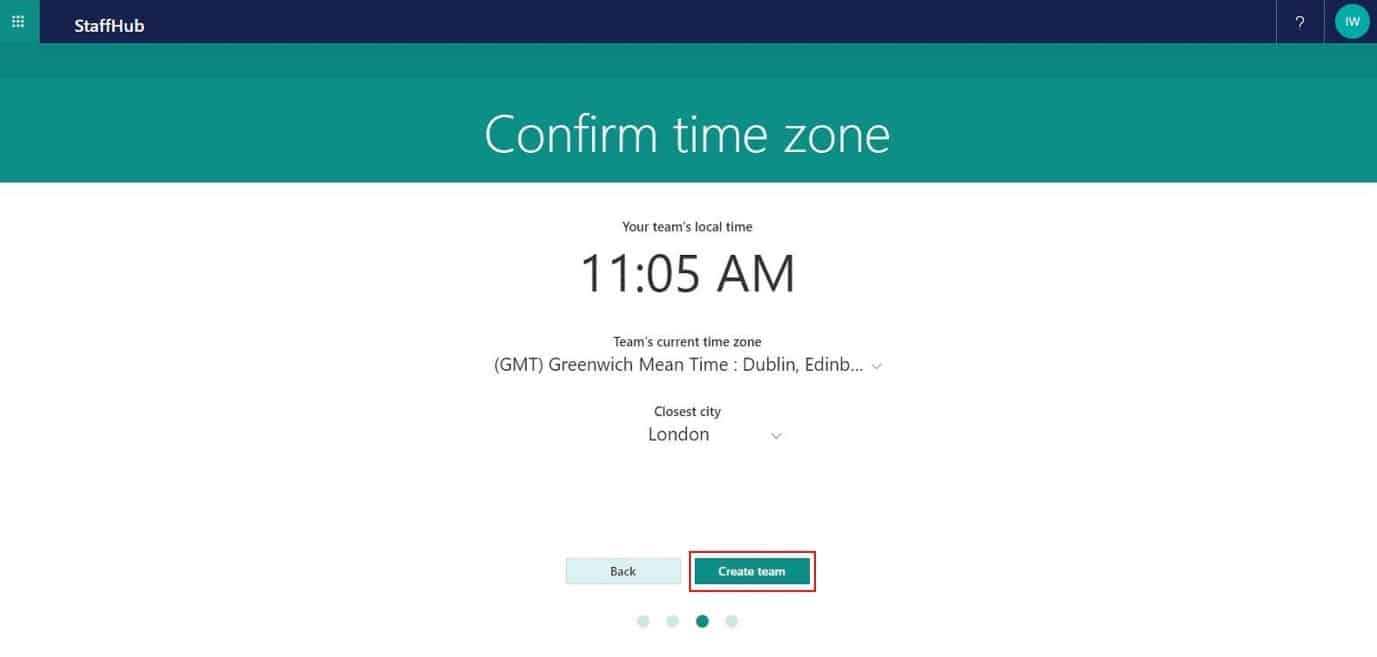
Set the time zone for your business and click on ‘Create Team’.

If you want to test out the mobile app enter your mobile number and click ‘Send Link’. It’s definitely worth installing the mobile app so you can see which employees are working through the week and make changes if required. You will later want your employees to install the app too, that way they can keep up to date with which shifts they are working.

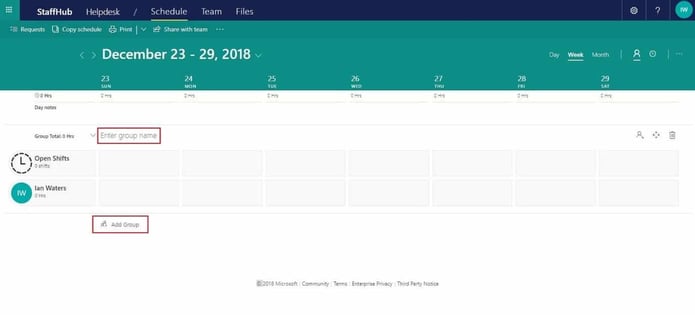
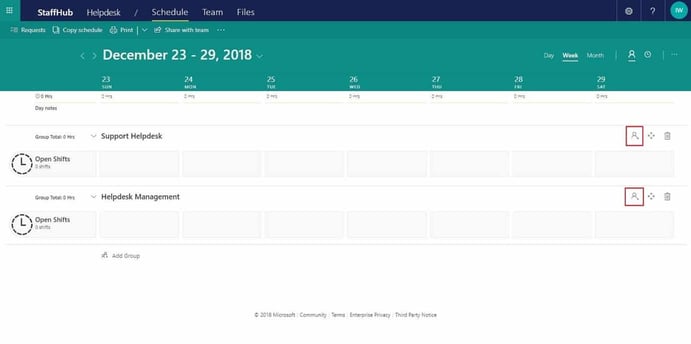
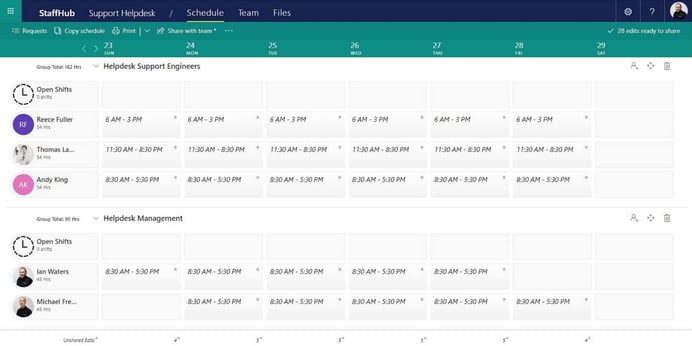
Here is the shift rota screen, where you can divide up your employees into groups. You may have a Sales teams group, Customer Services group, or a management group. Setting up groups makes managing your shift rotas much easier as it will keep employees in those groups together, making it easy to see who is in for each department for each day.
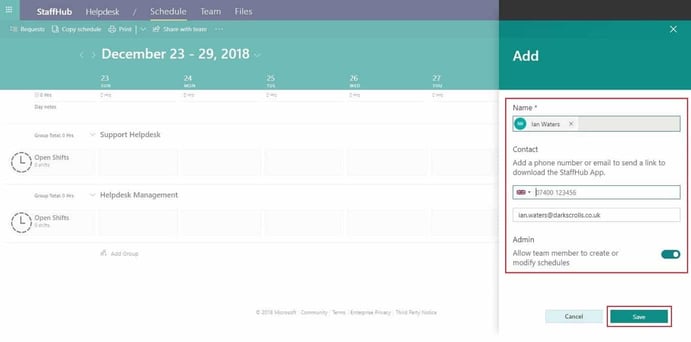
In this example I create a group for Support Helpdesk and one for Helpdesk Management. You can add employees to each of these groups by clicking on the icon as shown below.
Type in the name of the employee and enter their mobile number and email address. This will send them a link to the application and mobile download. You will likely want to deselect the ‘Allow team member to create or modify schedules’ for all staff except for management.
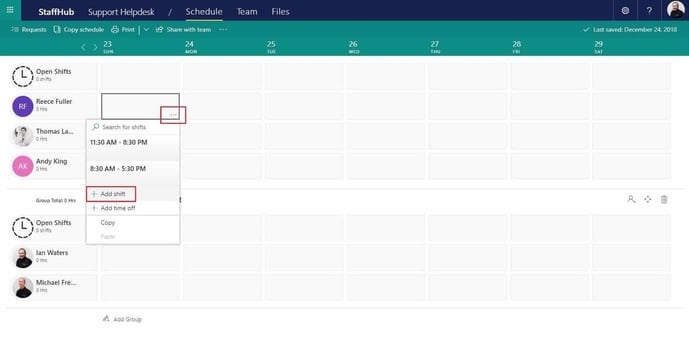
Once all of your groups are setup and employees assigned, you can start to add shifts for each one.

To add a shift click on the three dots and click ‘Add shift’ as shown below. Note, you can also add time off requests here too.
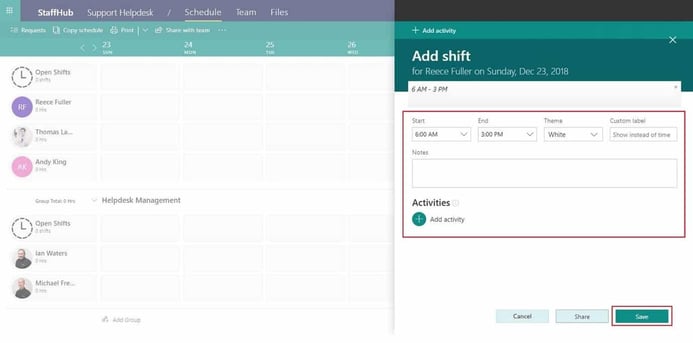
Adding a shift lets you set the start and end time. Here you can also add Notes and even a list of activities, very useful!
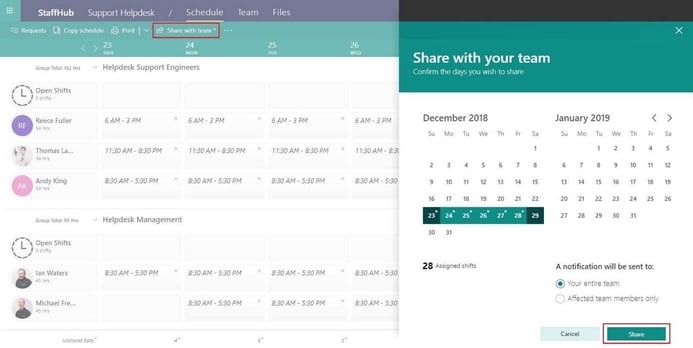
Once you have completed the shift rota for the week you can share it with the team.
Click on ‘Share with team’ and you will be given the choice to set which weeks employees can see. Here I select only the shifts for next week and share them with everyone and click ‘Share’.
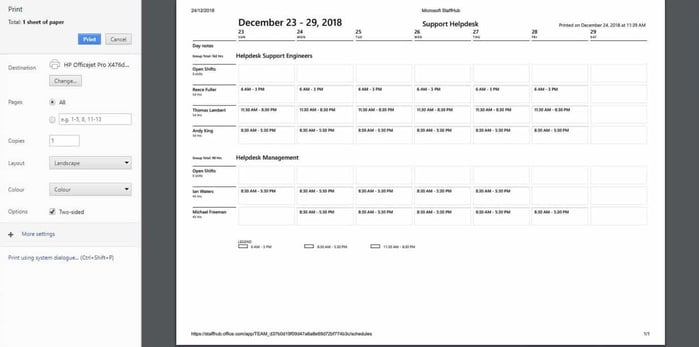
If you want to print a copy of the shift rota to pin to the staff notice board simply click ‘Print’ from the top menu.
Office 365 Staff Hub is a great way to manage your shift rotas. It’s quick and easy and easily accessible by your employees.
View More Articles
Other Articles
Take a look at our most recent articles