
The Knowledge Centre

Outlook App
Step 1:
Open Outlook on your computer.
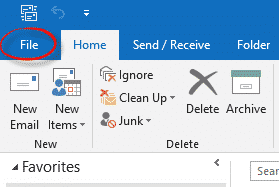
Step 2:
Click on “File” at the top left of your screen.
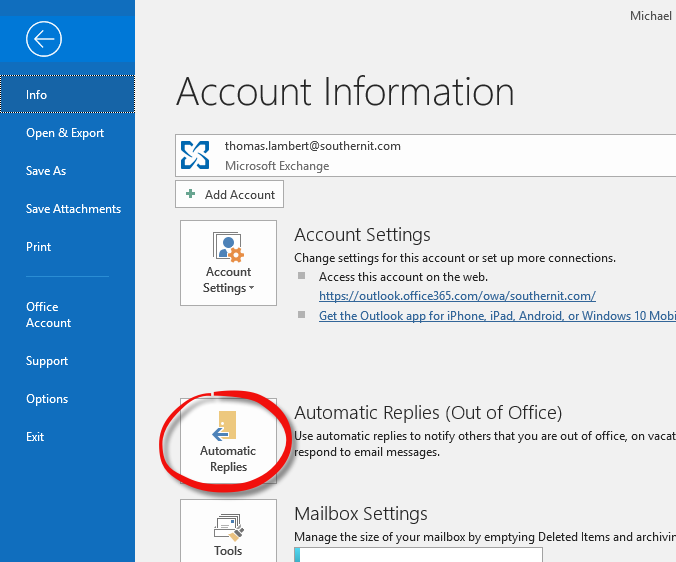
Step 3:
Click on “Automatic Replies” on the menu screen.
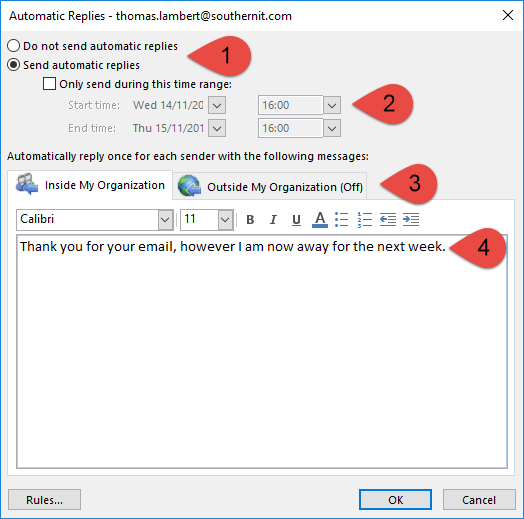
Step 4:
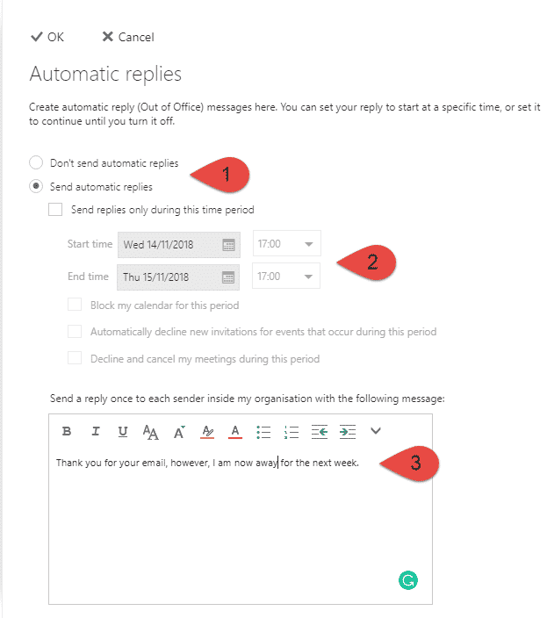
Once on the Automatic Replies you will be able to set up everything you need.
- Gives you the option to enable or disable your Out-Of-Office.
- This is where you set your Out-Of-Office time frame, if this is left blank then it will always be enabled until you personally go back here to disable it.
- Here you can pick between what message people within your organisation receive, compared to what people externally will see.
- And finally this is where you type your email response.
Outlook Online
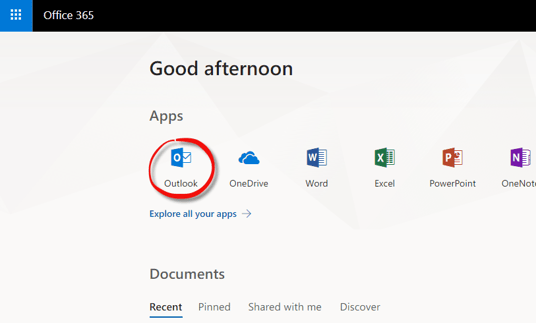
Step 1:
First Log into https://portal.office.com and navigate to your Outlook.
Step 2:
Once it has loaded, you will need to click on the gear icon at the top right of the screen, you will receive a side menu, click on the “Automatic replies” option.
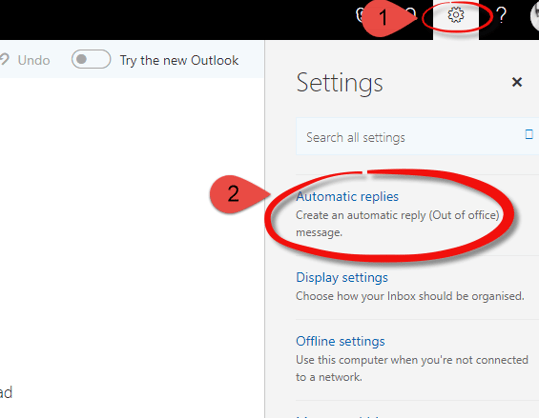
Step 3:
Once on the Automatic Replies you will be able to set up everything you need.
- Gives you the option to enable or disable your Out-Of-Office.
- This is where you set your Out-Of-Office time frame, if this is left blank then it will always be enabled until you personally go back here to disable it.
- And finally this is where you type your email response.
View More Articles
Other Articles
Take a look at our most recent articles