
The Knowledge Centre

Step 1:
First Log into https://portal.office.com or use the Outlook program and navigate to your personal calendar.
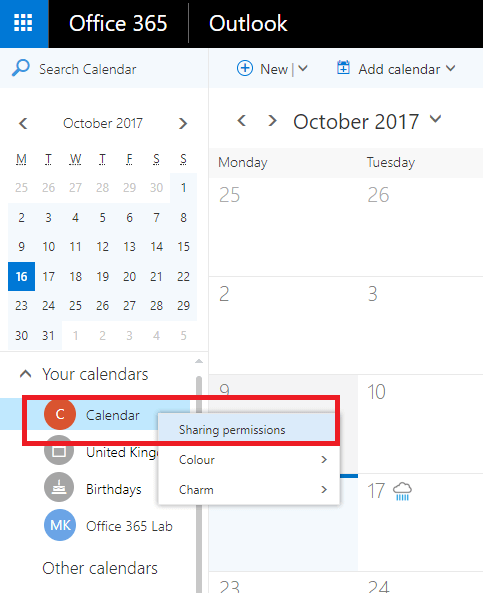
Step 2:
Right click on your calendar and click on Sharing permissions.
Step 3:
Next you have the option to set permissions for everyone in your business. The default is that everyone can see if you are busy or not.
If you want to can change the permissions you can set them as:
- Not shared
- View titles and locations
- View all details
- Can edit
If you want everyone to be able to add items to your calendar or change entries then set the permissions to ‘can edit’. If you want to let everyone see all of the entries set it to ‘View all details’.

Step 4:
If you don’t want everyone to have special permissions you can enter their name in the box and click on share. Next set the special permissions for that person and click on Share.
Its good practice to only give edit or view permissions to specific people but it’s up to you and your requirements.
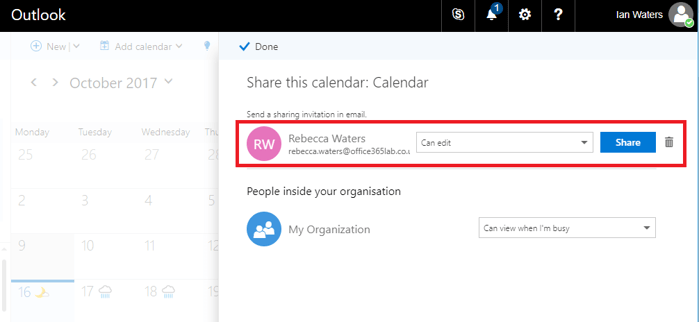
Step 5:
Once you click on Share the user and their special permissions will be listed below. You can remove people and change the permissions at any time.
Once you have finished editing the permissions click on ‘Done’ to finish.

Summary
Sharing your calendar is quick and easy. It’s a useful feature for managers who want to delegate access to their calendars, or for engineers who want to receive jobs while out in the field from the office.
View More Articles
Other Articles
Take a look at our most recent articles